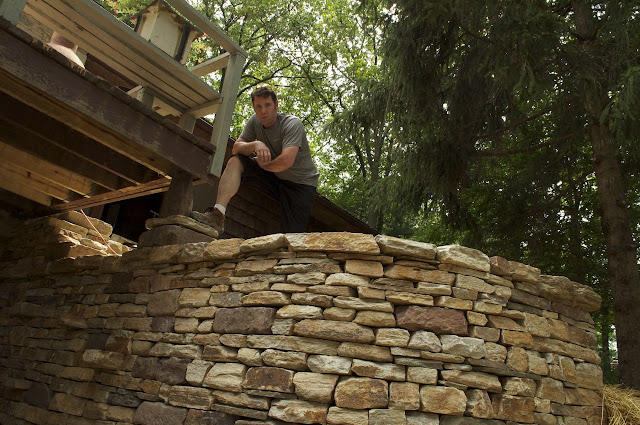
I've gathered a few of my pictures to show the work in progress. I always love to see how others work on jobs. I never get much from pictures of finished work. I like to see the journey on how and why stone masons did what they did. It's like reading a book.
Enjoy
Before! Wow time for a make over!
Dig out and mark with marking paint. Cut cement patio for foundation stones.
Foundation 3 ft. + wide. Large stones placed on earth.
Foundation built flat all the way into bank. Not stepped. Packing on foundation to make level.
Stones placed length into wall. Building to string line - level. Covering joints.
Packing stones on the inside.
Building back up to height of front as I go. String line shows grade (earth which will be covering the wall). Safety note: metal rebar has cover for job safety.
Job site. With a mix of different stones. face, packing, and back side stone. Lunch cooler not to be used in wall.
Building curve. Notice building from one direction. This helps reduce the likelihood of getting into a corner. Having to find that special stone. Notice also all stones on same level. Except for the red stone by the pole. "Jumper"- this will break up the design giving a nice visual focal point. This style would be called "Coursed Random with jumpers". Course is like building with bricks all on the same rows. It has been said for a retaining wall, Course would have a horizontal running joint. Making a Random with jumpers stronger. The Jumper is a stone which is larger - the stones next to it will have to be 2 (best) or 3 (ok) stacked to reach the top of the jumper.
Wall frames are built to a 1:5 = for every 5" inches of height I come in 1" inch. (1:5 batter.) You tie your strings to the inside of the wall frames to help you as a guide as you build. Not to touch them. Helping you be level and building to the correct batter. Orange flag to remind me not to hit my head.
"Three-quarter throughs" since I didn't have 3ft length ties. 2 stones next to each other with over lap.
Notice the # 9 (or is it a 6) in the red stone? Red stone from old foundation.
Building back up as I build front. Corner has rip rap stone for building wall. This will be covered by earth soon.
Dirt placed on corner to see the grade.
Wall head being built with rip rap below grade. Tent to keep me cool. Small wall frames set up to help build double sided wall. String line on stake to help show grade level. No point to build a pretty wall if you can't see it.
More corner work. Notice to right of wall head lower rip rap wall will be under grade (earth).
Building level to place first step stone.
Placing first stone with skid loader. This stone is 4' L x 2' w x 7" thick. Butler stone weighs 178 pound per cubic foot. Heavy is what I call it!
Building back to match front stone and level at same time. Then I build up to match first stone. For second stone to sit on. Blue colored metal stakes help me roll large stones around. Levels I normally only really use the small and 2ft the most. The 4ft is rare to have out. You may have noticed I used a string line bulb throughout the job. Bucket holds my small packing stones.
Second step - notice level. Dead on the bulb. Man I'm good. ha ha. Build level and your work will be easy. When you have a gauged stone like what I'm working with.
Corner stone for the porch. Yes Stone is harder then WOOD!
Thank you for looking. Pictures always tell a story. Feel free to ask any questions or offer any feedback.


