

My day started out running to the quarry to pick up some 3/8" washed gravel for the patio base. Just wanted to get a load to stockpile at our farm. When I'm ready to start the upper patio being (under 200 sq ft ) I can bring the #8 stone in the oil tanks.

On the way to the jobsite I stopped at Home Depot to pick up some more PVC plumbing pipe fittings. Once on site, I went ahead and swapped one of the gutter elbows out with a better elbow. Along with added another to the end. So I could get everything away from the steps in preparation for middle/upper walls.

One thing that really helps save time and money with shaping stone is the stone splitter. This really allows me to take a stone and trim it the way I need in order to properly place it. For example the curves are a great way to explain what I need when shaping... Pizza Slices all day long. When making these custom shaped curves which start at the bottom of the steps. I can truly find the stone I like then snap it to get the angles necessary for a visual and tight fit. The stone below I just squared up on the sides having started with what you see in top image.


In this image you can really see the angles of the curves of all the walls. You are also able to really see just how much stone should be used in a properly built dry laid stone wall. The style I'm using for my retaining walls is a double sided. This style is referred to Yorkshire (GB). This is made up with a front wall - a back wall and hearting/packing in the middle. click on any of these images to go bigger.

The far wall by the 4th step has the first 2 caps placed. Making the wall 28" height in the lower sections.

This image is just to show how the wall curves back over to the house. Also you can see all the 1/2" pvc sleeves to each step. For the low voltage lighting to come at the end.
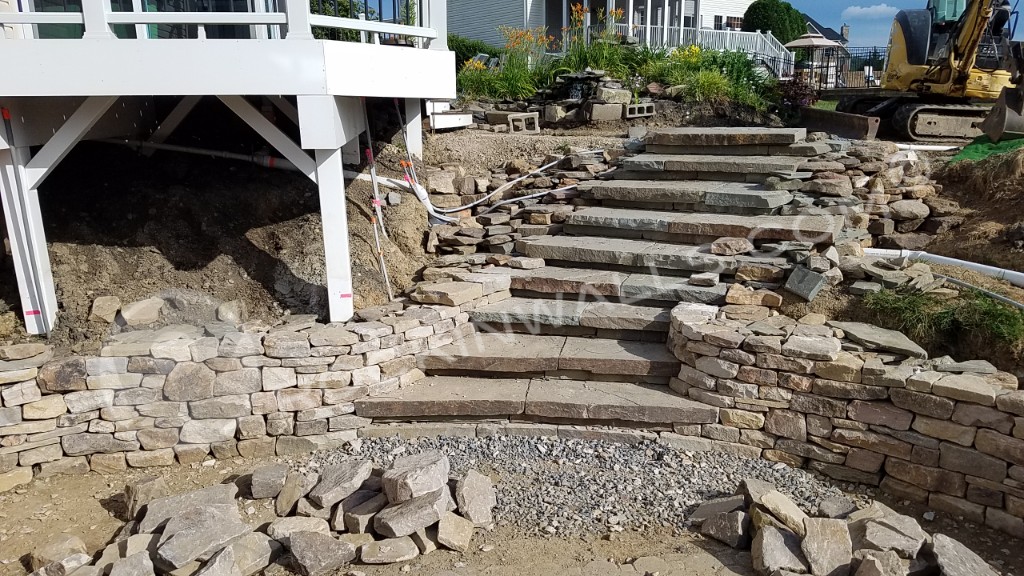
Now to work with this design I'll be including 2 more walls. Second wall in the middle built from the 4 step to 7th step (that's the plan) Third wall will be to help hold and retain the bedding stone for the upper patio. This will extend about 15' out from house headed toward mini excavator in this image. One thing enjoy when I'm build my projects I like to let the stone help dictate the design as I go. I always go into each project with a over all plan. Not like segmental blocks which are square I can create just about endless shapes. Natural stone never goes out of style, nor will it show fade color, your not confided to material shape restrictions. Withstand the natural elements over 100's of years not break down.
Make your next outdoor space natural stone for generations and generations to enjoy.
These posts are so helpful.Thanks for taking the time to document your work. I learn a lot. I have the ziplevel too. It has been very helpful.
ReplyDelete